Connect a camera to the Dev Board Mini
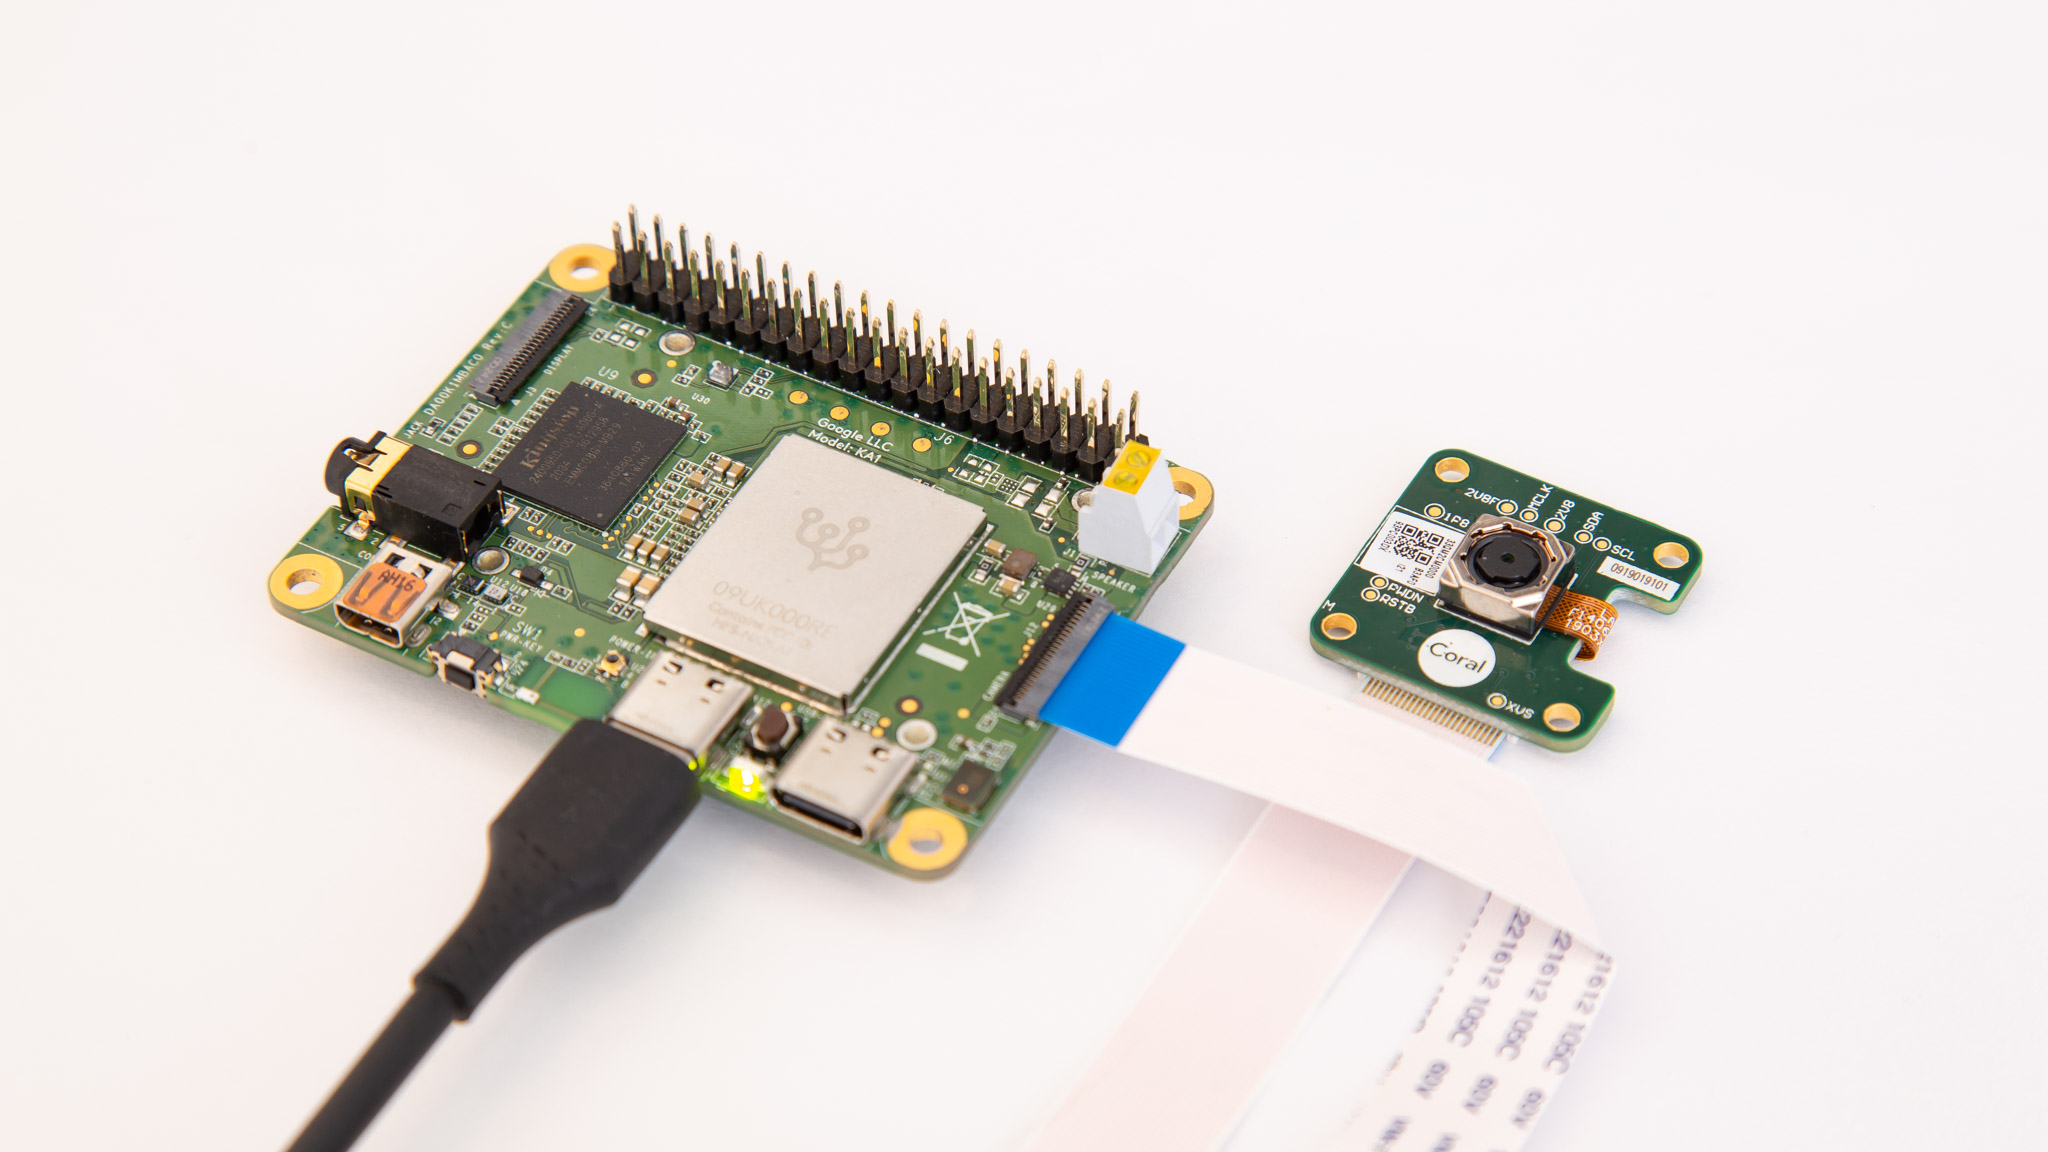
To perform real-time inferencing with a vision model, you can connect the Dev Board Mini to the Coral Camera.
Once you connect your camera, try the demo scripts below.
- USB cameras are currently not supported with the Dev Board Mini. Because the board's USB port supports USB 2.0 only, the limited bandwidth makes it difficult to sustain both a high frame-rate and high image quality. We're working to support USB cameras, but for optimal performance, we recommend using the CSI camera interface.
- The CSI cable connector on the Dev Board Mini is designed to be compatible with the Coral Camera only.
Connect the Coral Camera
The Coral Camera connects to the CSI connector on the top of the Dev Board Mini.

You can connect the camera to the Dev Board Mini as follows:
- Make sure the board is powered off and unplugged.
-
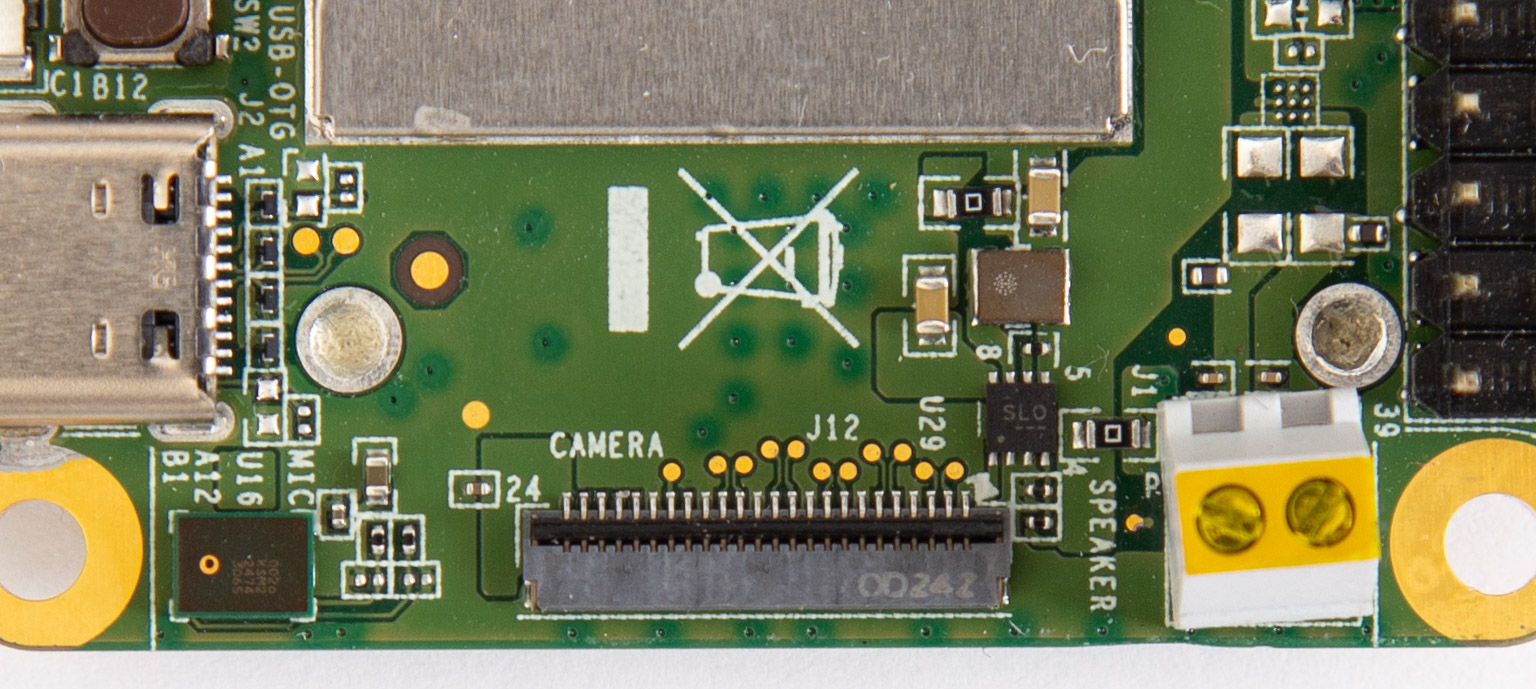
On the top of the Dev Board Mini, locate the "Camera" connector and flip the small black latch so it's facing upward, as shown in figure 1.

Figure 1. The board's camera connector with the latch open -
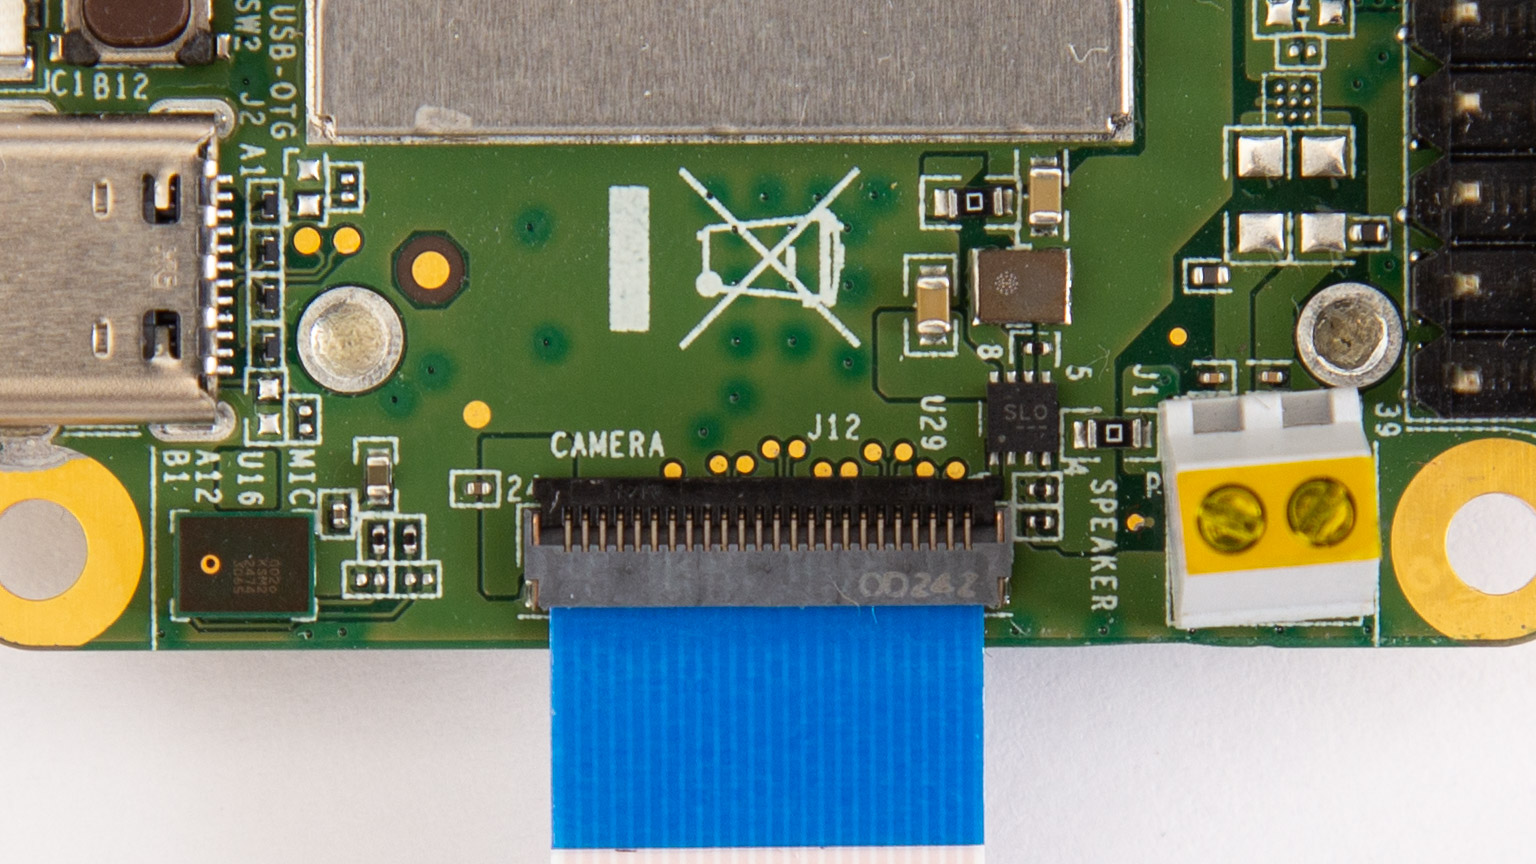
Slide the flex cable into the connector with the contact pins facing toward the board (the blue strip is facing away from the board), as shown in figure 2.
-
Close the black latch.

Figure 2. The cable inserted to the board and the latch closed -
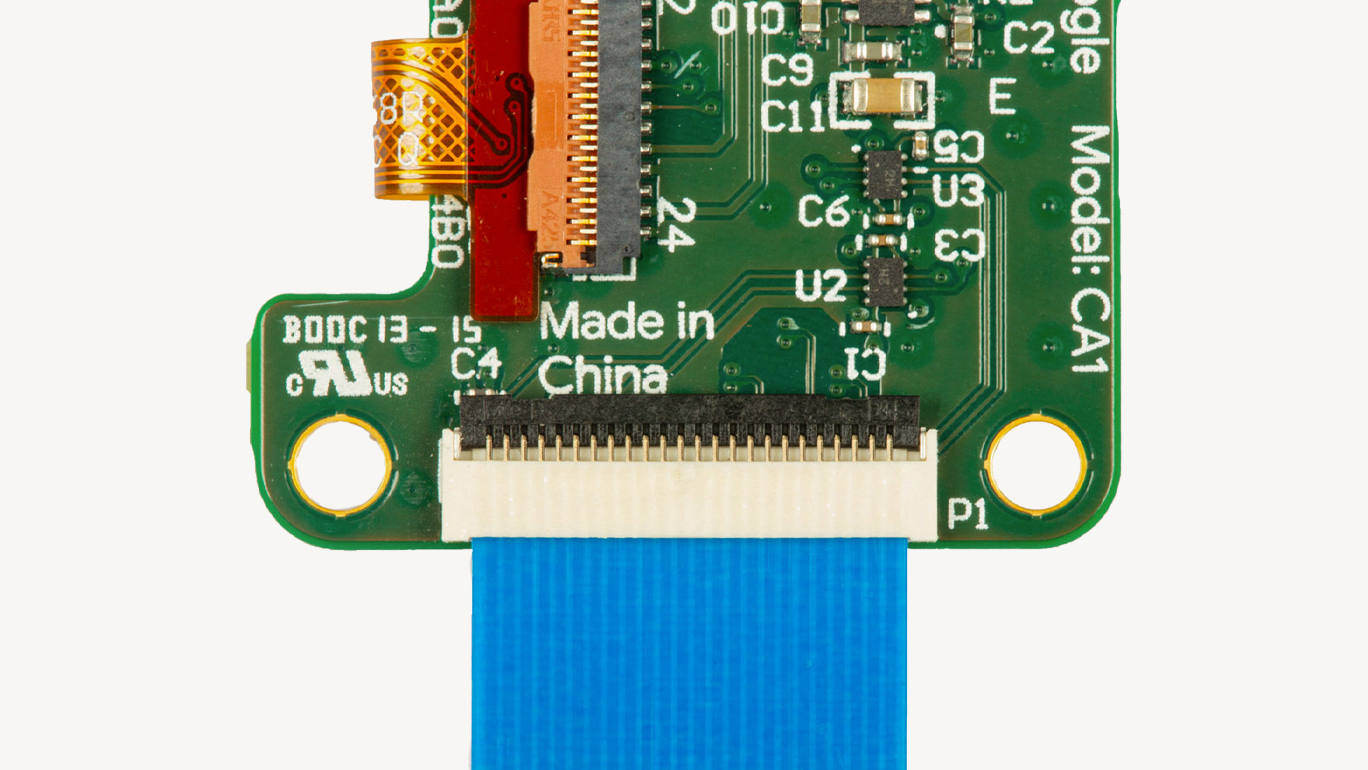
Likewise, ensure that the other end is secured on the camera module.

Figure 3. The camera cable connected to the camera module -
Power on the board and verify it detects the camera by running this command:
v4l2-ctl --list-devicesYou should see the camera listed as
/dev/video1:platform:mt8167 (platform:mt8167): /dev/video0 /dev/video1 14001000.rdma (platform:mt8173): /dev/video2Note: Even when the camera is not connected, you will seevideo0andvideo2listed, because they represent the MediaTek SoC's video decoder and scaler/converter, respectively.
For a quick camera test, connect to the board's shell terminal and run the snapshot tool:
snapshotIf you have a monitor attached to the board, you'll see the live camera feed.
You can press Spacebar to save an image to the home directory.
Run a demo with the camera
The Mendel system image on the Dev Board Mini includes two demos that perform real-time image classification and object detection.
First, connect a monitor to the board's micro HDMI port so you can see the video results.
Then log on to the board (using MDT or the serial console) and run these commands to be sure you have the latest software:
sudo apt-get update

sudo apt-get dist-upgradeDownload the model files
Before you run either demo, you'll need to download the model files on your board.
First, set this environment variable:
export DEMO_FILES="$HOME/demo_files"Then download the following files on your board (be sure you're connected to the internet):
# The image classification model and labels file
wget -P ${DEMO_FILES}/ https://github.com/google-coral/test_data/raw/master/mobilenet_v2_1.0_224_quant_edgetpu.tflite

wget -P ${DEMO_FILES}/ https://raw.githubusercontent.com/google-coral/test_data/release-frogfish/imagenet_labels.txt

# The face detection model (does not require a labels file)
wget -P ${DEMO_FILES}/ https://github.com/google-coral/test_data/raw/master/ssd_mobilenet_v2_face_quant_postprocess_edgetpu.tflite
Run a classification model
This demo classifies 1,000 different objects shown to the camera:
edgetpu_classify \
--model ${DEMO_FILES}/mobilenet_v2_1.0_224_quant_edgetpu.tflite \
--labels ${DEMO_FILES}/imagenet_labels.txt
Run a face detection model
This demo draws a box around any detected human faces:
edgetpu_detect \
--model ${DEMO_FILES}/ssd_mobilenet_v2_face_quant_postprocess_edgetpu.tflite
Try other example code
We have several other examples that are compatible with almost any camera and any Coral device with an Edge TPU (including the Dev Board). They each show how to stream images from a camera and run classification or detection models . Each example uses a different camera library, such as GStreamer, OpenCV, and PyGame.
To explore the code and run them, see the instructions at github.com/google-coral/examples-camera.
Is this content helpful?