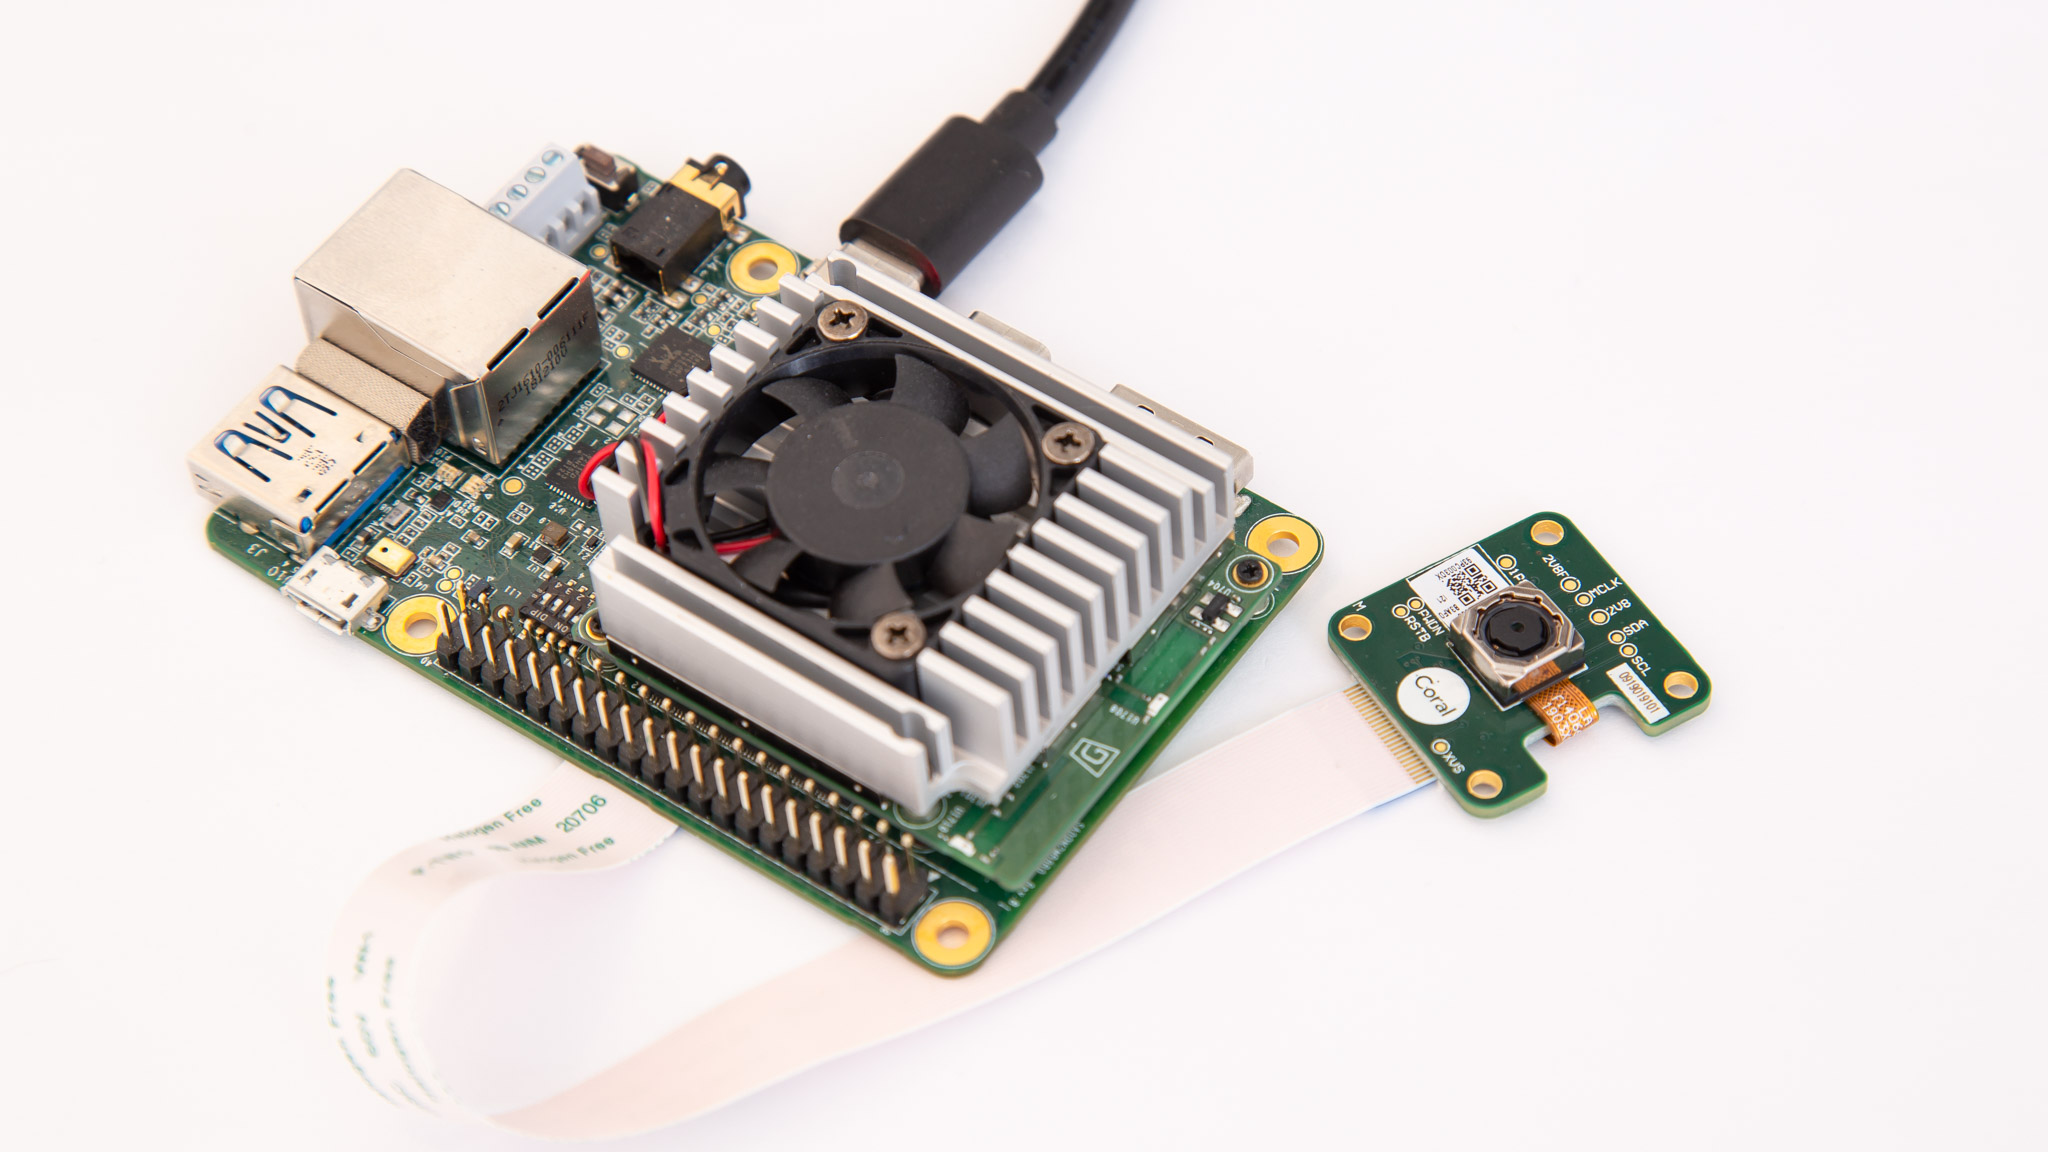
Connect a camera to the Dev Board
To perform real-time inferencing with a vision model, you can connect the Dev Board to the Coral Camera or a USB camera.
Once you connect your camera, try the demo scripts below.
Connect the Coral Camera
The Coral Camera connects to the CSI connector on the bottom of the Dev Board.
You can connect the camera to the Dev Board as follows:
- Make sure the board is powered off and unplugged.
-
On the bottom of the Dev Board, locate the CSI "Camera Connector" and flip the small black latch so it's facing upward, as shown in figure 1.
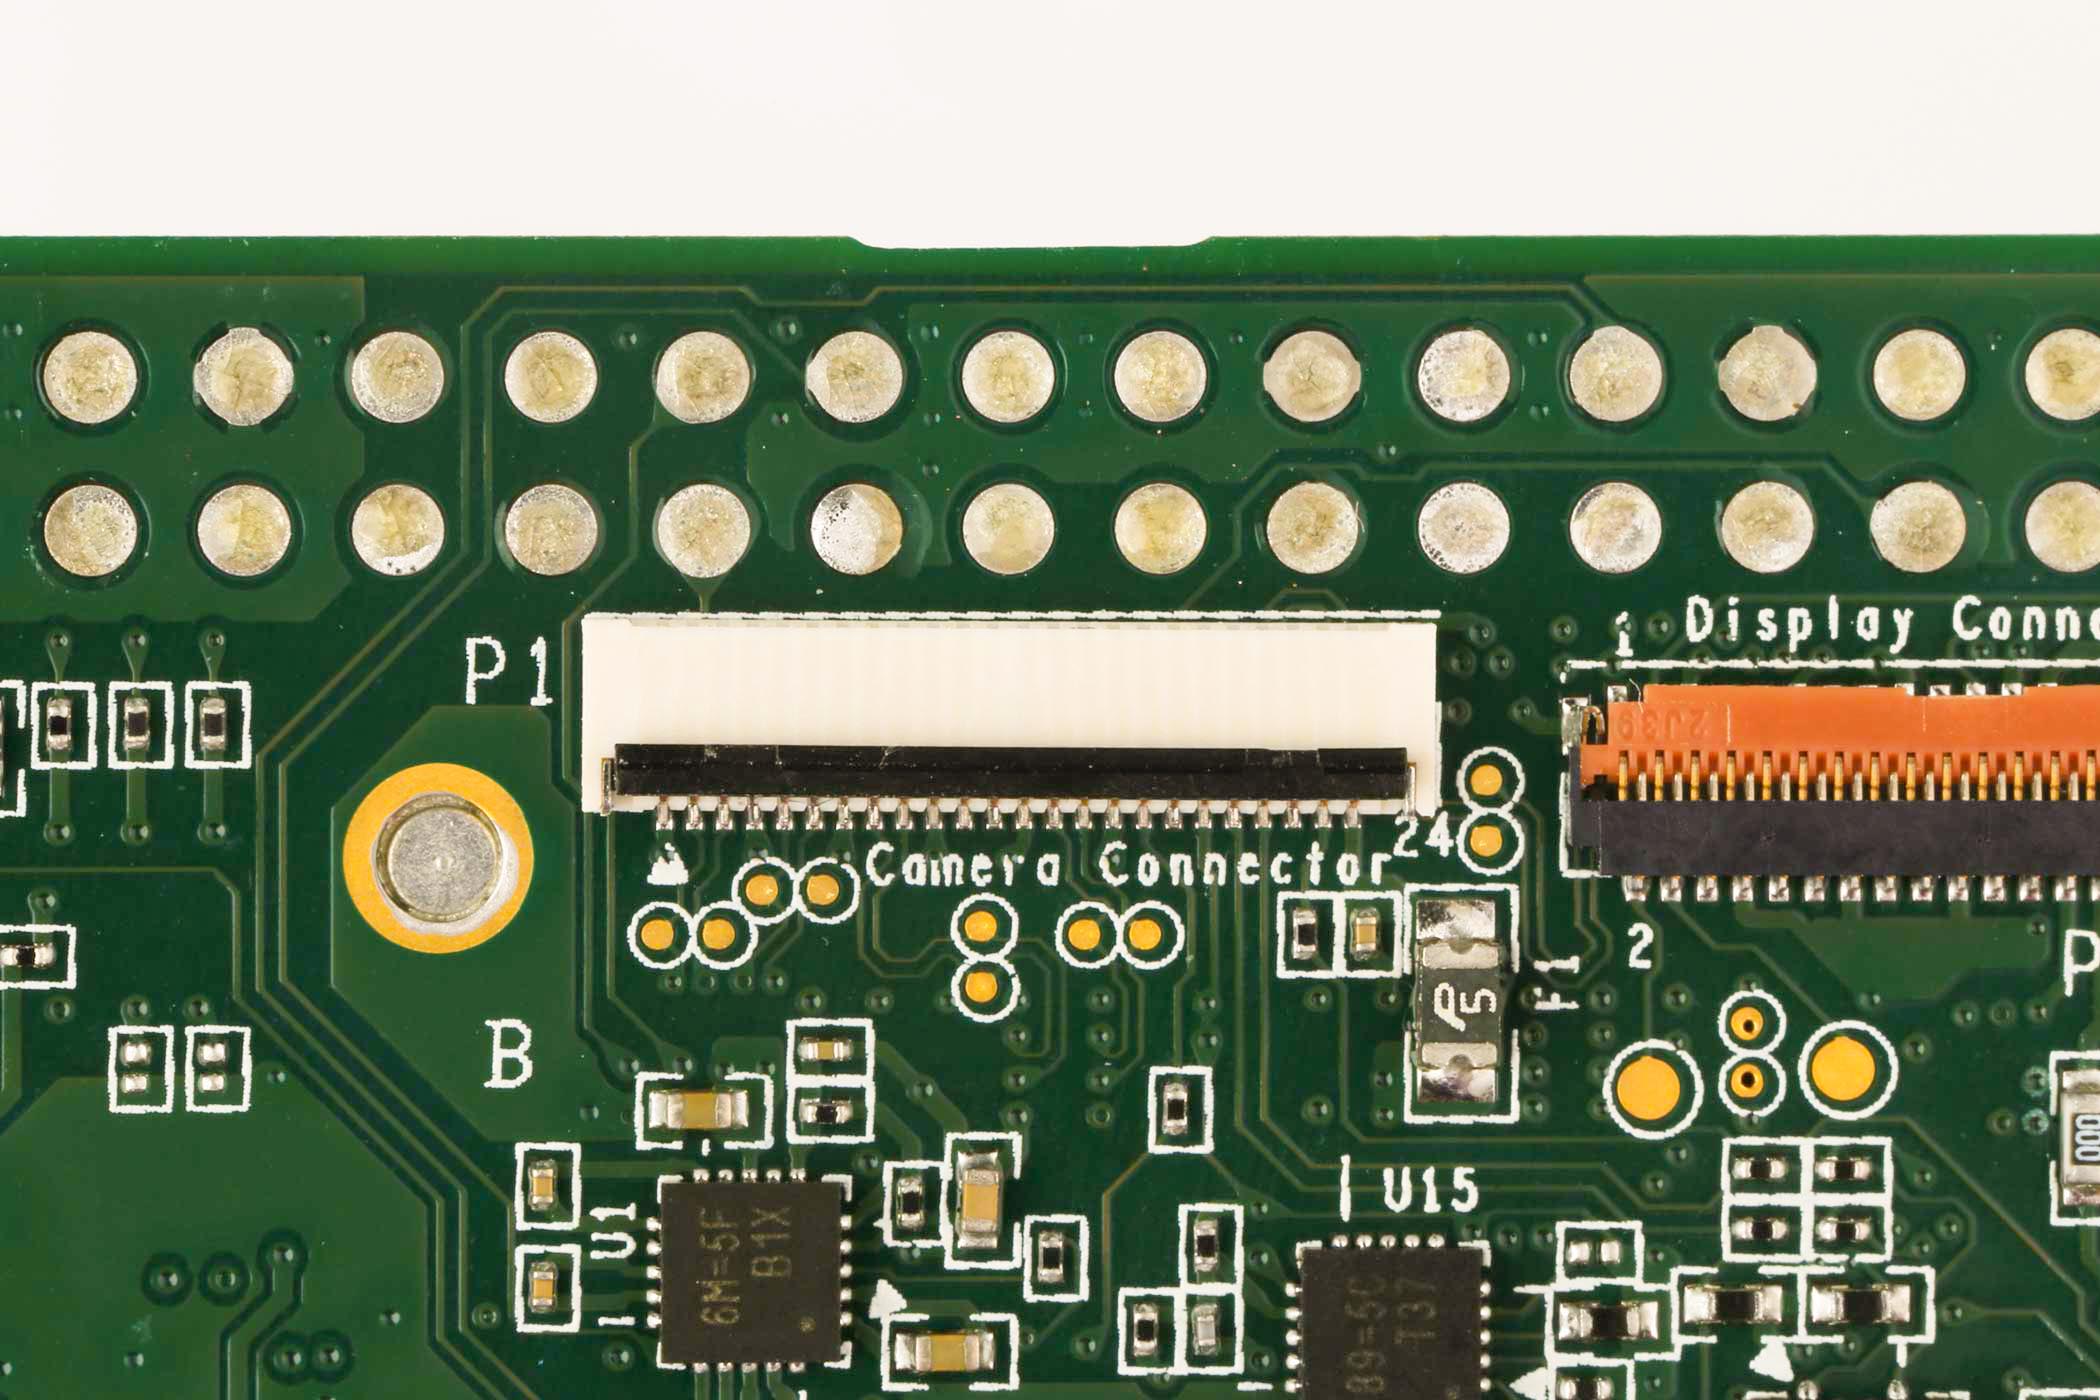
Figure 1. The camera connector with the latch open -
Slide the flex cable into the connector with the contact pins facing toward the board (the blue strip is facing away from the board), as shown in figure 2.
-
Close the black latch.
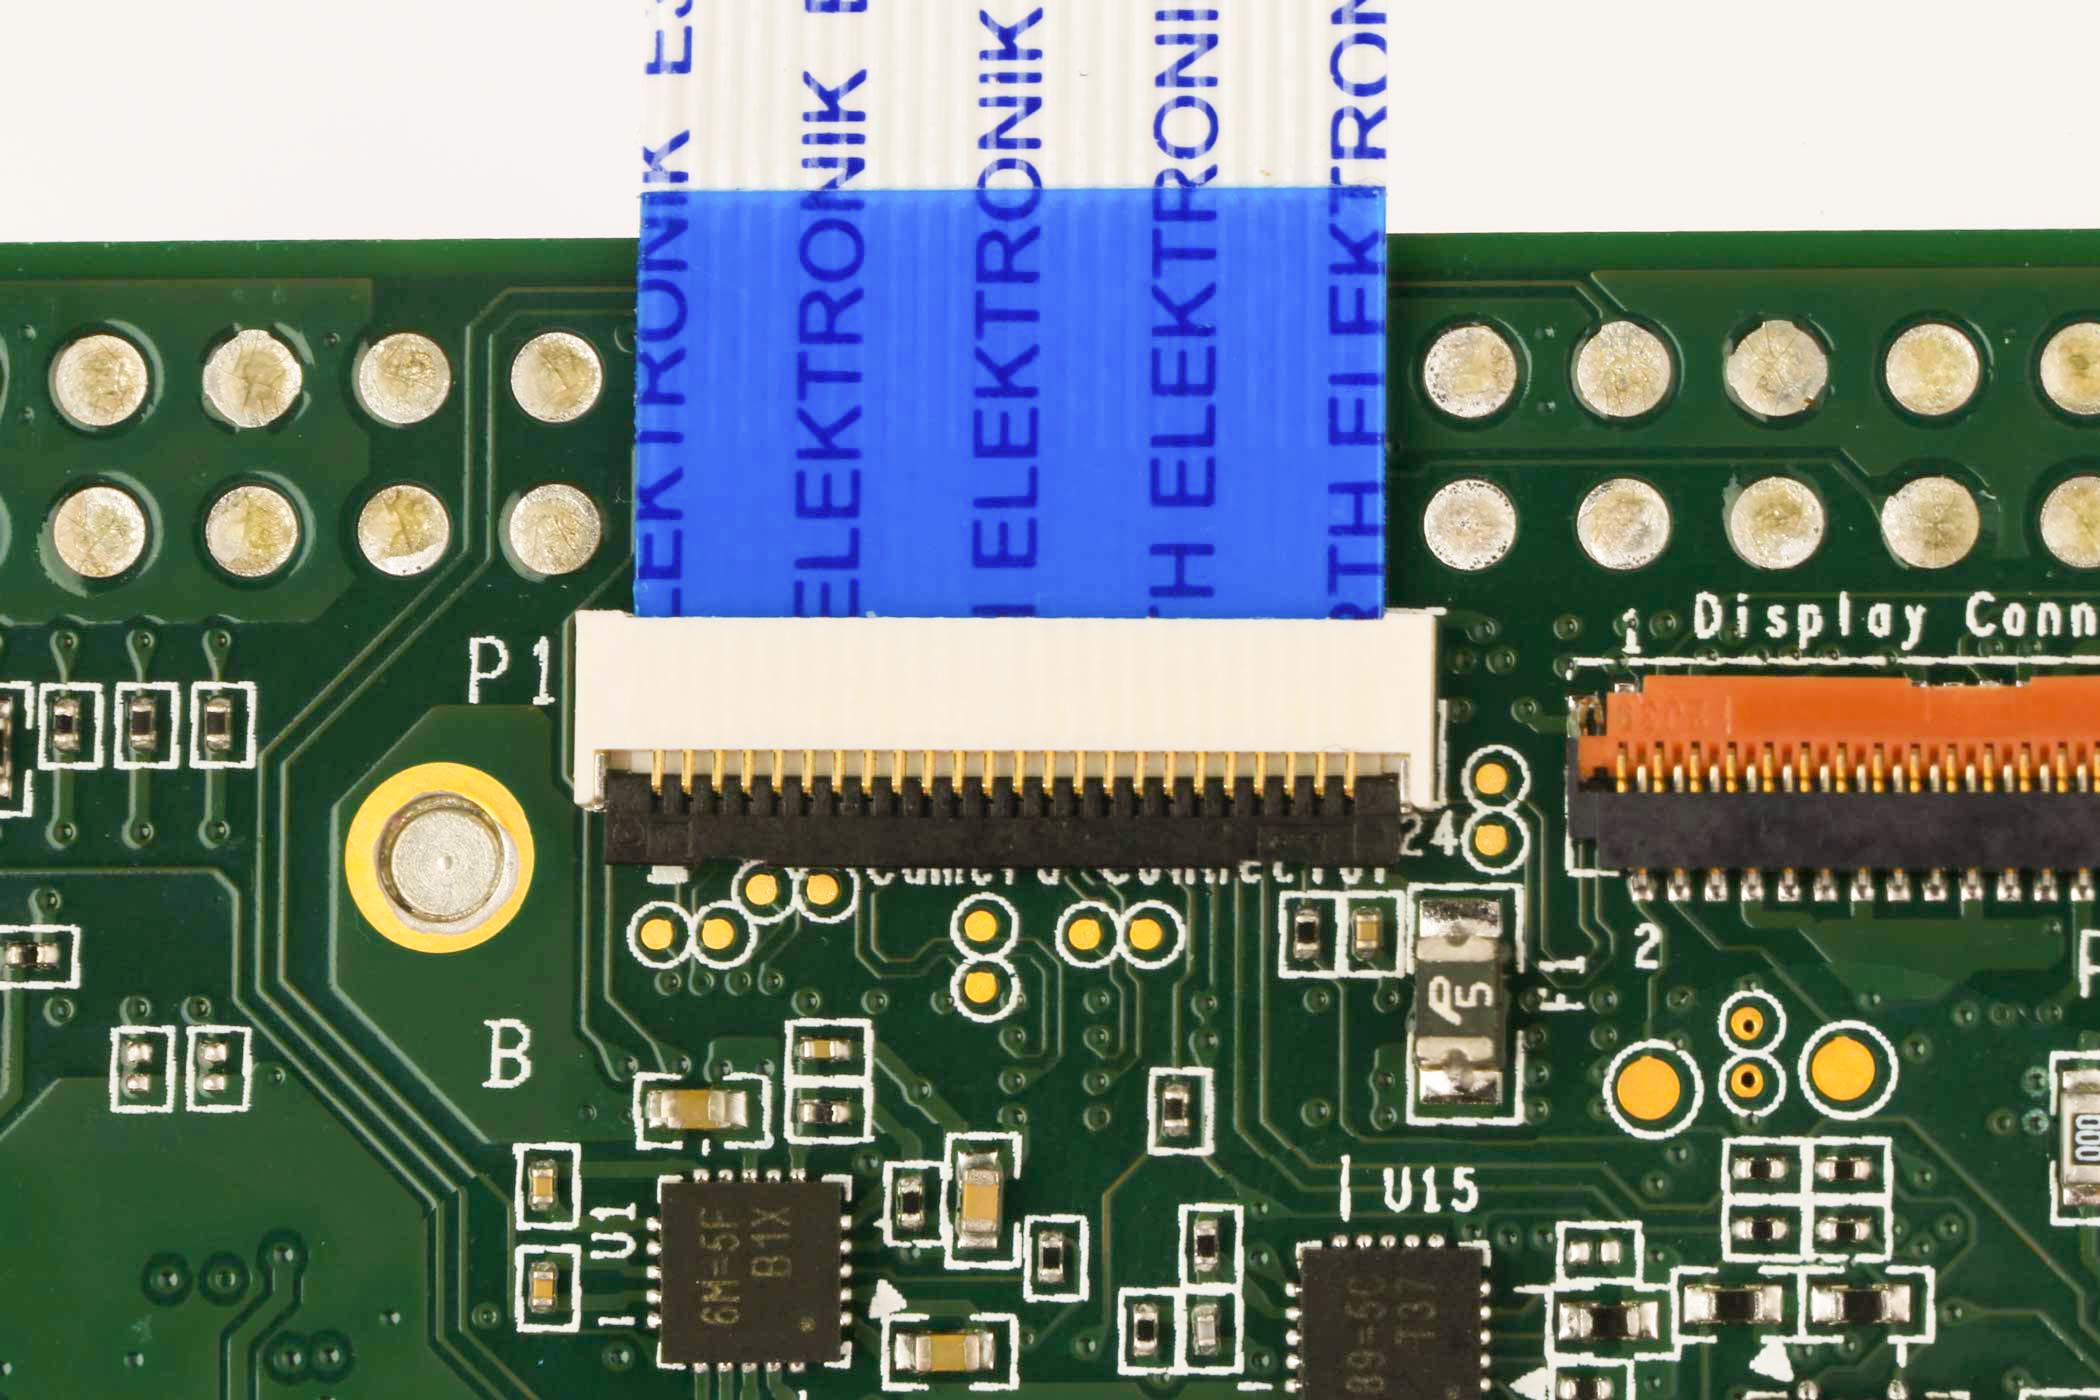
Figure 2. The camera cable inserted and the latch closed -
Likewise, connect the other end of the flex cable to the matching connector on the camera module.
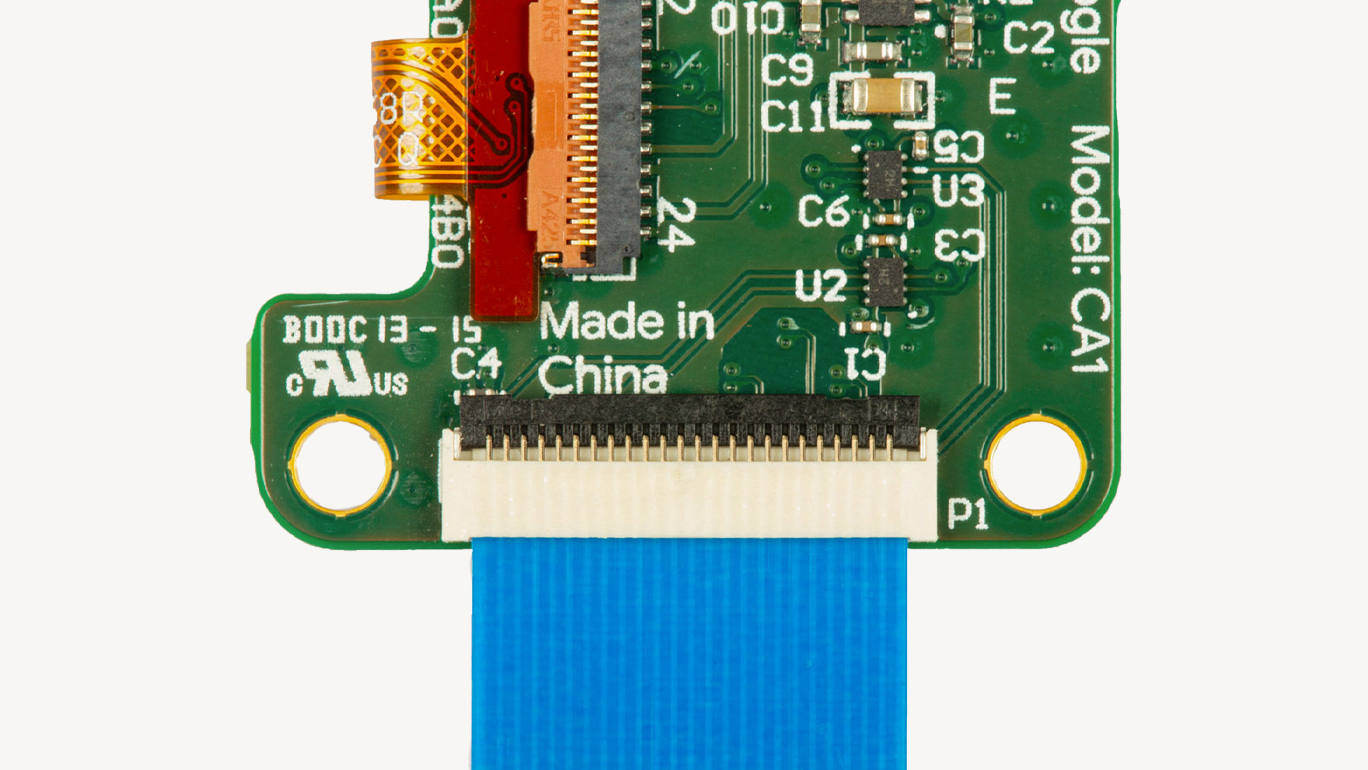
Figure 3. The camera cable inserted in the camera module -
Power on the board and verify it detects the camera by running this command:
v4l2-ctl --list-devicesYou should see the camera listed as
/dev/video0:i.MX6S_CSI (platform:30a90000.csi1_bridge): /dev/video0
For a quick camera test, connect to the board's shell terminal and run the snapshot tool:
snapshotIf you have a monitor attached to the board, you'll see the live camera feed.
You can press Spacebar to save an image to the home directory.
Then try running a model with the demo scripts below.
Connect a USB camera
Any USB camera that matches the USB UVC standard should be compatible with the Dev Board.
Just plug in the camera to the USB-A port. (It's okay if the board is already powered on.)
Then enter the following command to list the camera's supported video formats:
v4l2-ctl --list-formats-ext --device /dev/video1You should see a long list of results that looks something like this:
ioctl: VIDIOC_ENUM_FMT
    Index       : 0
    Type        : Video Capture
    Pixel Format: 'YUYV'
    Name        : YUYV 4:2:2
        Size: Discrete 640x480
            Interval: Discrete 0.033s (30.000 fps)
            Interval: Discrete 0.042s (24.000 fps)
            Interval: Discrete 0.050s (20.000 fps)
            Interval: Discrete 0.067s (15.000 fps)
            Interval: Discrete 0.100s (10.000 fps)
            Interval: Discrete 0.133s (7.500 fps)
            Interval: Discrete 0.200s (5.000 fps)
Take note of the size and available FPS values. You'll need to pass those in the demo scripts below, though the default values shown below should work for most cameras.
Pixel Format: 'YUYV'.
Currently, YUYV
is the only format supported. But the commands below refer to this format
with the name YUY2, which is just a different name for the same thing.
Run a demo with the camera
The Mendel system image on the Dev Board includes two demos that perform real-time image classification and object detection.
First, make sure you have the latest software on your board:
sudo apt-get update

sudo apt-get dist-upgradeDownload the model files
Before you run either demo, you'll need to download the model files on your Dev Board.
First, set this environment variable:
export DEMO_FILES="$HOME/demo_files"Then download the following models (be sure you're connected to the internet):
# The image classification model and labels file
wget -P ${DEMO_FILES}/ https://github.com/google-coral/test_data/raw/master/mobilenet_v2_1.0_224_quant_edgetpu.tflite

wget -P ${DEMO_FILES}/ https://raw.githubusercontent.com/google-coral/test_data/release-frogfish/imagenet_labels.txt

# The face detection model (does not require a labels file)
wget -P ${DEMO_FILES}/ https://github.com/google-coral/test_data/raw/master/ssd_mobilenet_v2_face_quant_postprocess_edgetpu.tflite
To run each demo, we've provided two ways to see the video and inference results:
- Using a monitor attached to the Dev Board via HDMI
- Using a streaming server that allows you to see the video from another computer's web browser when on the same network
View on a monitor
The following demos require that you have a monitor connected to the HDMI port on the Dev Board so you can see the video.
Run the image classification model with a monitor
This demo classifies 1,000 different objects shown to the camera.
If you're using the Coral Camera:
edgetpu_classify \
--model ${DEMO_FILES}/mobilenet_v2_1.0_224_quant_edgetpu.tflite \
--labels ${DEMO_FILES}/imagenet_labels.txt
If you're using a USB camera:
edgetpu_classify \
--source /dev/video1:YUY2:800x600:24/1 \
--model ${DEMO_FILES}/mobilenet_v2_1.0_224_quant_edgetpu.tflite \
--labels ${DEMO_FILES}/imagenet_labels.txt
In the --source argument (for the USB camera only), you must specify 4 parameters
using values printed during the USB camera setup:
/dev/video1is the device file. Yours should be the same if it's the only attached camera.YUY2is the only supported pixel format (same asYUYV).800x600is the image resolution. This must match one of the resolutions listed for your camera.24/1is the framerate. It must also match one of the listed FPS values for the given format.
Run the face detection model with a monitor
This demo draws a box around any detected human faces.
If you're using the Coral Camera:
edgetpu_detect \
--model ${DEMO_FILES}/ssd_mobilenet_v2_face_quant_postprocess_edgetpu.tflite
If you're using a USB camera:
edgetpu_detect \
--source /dev/video1:YUY2:800x600:24/1  \
--model ${DEMO_FILES}/ssd_mobilenet_v2_face_quant_postprocess_edgetpu.tflite
See the previous section for details about the --source arguments.
View with a streaming server
These demos require that your Dev Board be network-accessible from another computer (such as when connected to the board shell via MDT) so you can see the camera output in a web browser.
Run the image classification model with a streaming server
This demo classifies 1,000 different objects shown to the camera.
If you're using the Coral Camera:
edgetpu_classify_server \
--model ${DEMO_FILES}/mobilenet_v2_1.0_224_quant_edgetpu.tflite \
--labels ${DEMO_FILES}/imagenet_labels.txt
If you're using a USB camera:
edgetpu_classify_server \
--source /dev/video1:YUY2:800x600:24/1  \
--model ${DEMO_FILES}/mobilenet_v2_1.0_224_quant_edgetpu.tflite \
--labels ${DEMO_FILES}/imagenet_labels.txt
In the --source argument (for the USB camera only), you must specify 4 parameters
using values printed during the USB camera setup:
/dev/video1is the device file. Yours should be the same if it's the only attached camera.YUY2is the only supported pixel format (same asYUYV).800x600is the image resolution. This must match one of the resolutions listed for your camera.24/1is the framerate. It must also match one of the listed FPS values for the given format.
With either camera type, you should see the following message:
INFO:edgetpuvision.streaming.server:Listening on ports tcp: 4665, web: 4664, annexb: 4666Which means your Dev Board is now hosting a streaming server. So from any computer that can access
the board, you can view the camera stream at http://<board_ip_address>:4664/. For example, if you're connected to the board shell over USB, then go to
http://192.168.100.2:4664/.
Run the face detection model with a streaming server
This demo draws a box around any detected human faces.
If you're using the Coral Camera:
edgetpu_detect_server \
--model ${DEMO_FILES}/ssd_mobilenet_v2_face_quant_postprocess_edgetpu.tflite
If you're using a USB camera:
edgetpu_detect_server \
--source /dev/video1:YUY2:800x600:24/1  \
--model ${DEMO_FILES}/ssd_mobilenet_v2_face_quant_postprocess_edgetpu.tflite
See the previous section for details about the --source arguments.
With either camera type, you should see the following message:
INFO:edgetpuvision.streaming.server:Listening on ports tcp: 4665, web: 4664, annexb: 4666Which means your Dev Board is now hosting a streaming server. So from any computer that can access
the board, you can view the camera stream at http://<board_ip_address>:4664/. For example, if you're connected to the board shell via MDT, then go to
http://192.168.100.2:4664/.
Try other example code
We have several other examples that are compatible with almost any camera and any Coral device with an Edge TPU (including the Dev Board). They each show how to stream images from a camera and run classification or detection models . Each example uses a different camera library, such as GStreamer, OpenCV, and PyGame.
To explore the code and run them, see the instructions at github.com/google-coral/examples-camera.
Is this content helpful?